
PaymentWorks - Vendor Invitations Training
PaymentWorks is a platform TTUHSC uses to connect financially and securely with its new and existing vendors. Approved personnel send an invitation to new vendors so they can create an account and make a connection with HSC through PaymentWorks. Invitations should only be sent to vendors when a requisition is required for payment.
Before engaging with PaymentWorks, be sure you have created and submitted your TechBuy requisition so Vendor Team can verify the vendor information prior to approving the invitation. You will also be asked to provide your requisition number on the PaymentWorks invitation.
As an initiator, review the following prospective vendors so they can go through the registration process.
- Business - send an invite to a new vendor if the business is not located in TechBuy or PaymentWorks. A current/existing vendor will also need an invite if they are needing to update any information (name, tax id, address, ACH, etc.).
- Individual/Sole Proprietor - send a new vendor invite if the individual is not in TechBuy or PaymentWorks.
- Employees, Students or Perspective Employees - should not be entered in PaymentWorks. Instead, send Vendor Setup Form to vendorteam@ttuhsc.edu.
The system can be accessed from:
- PaymentWorks
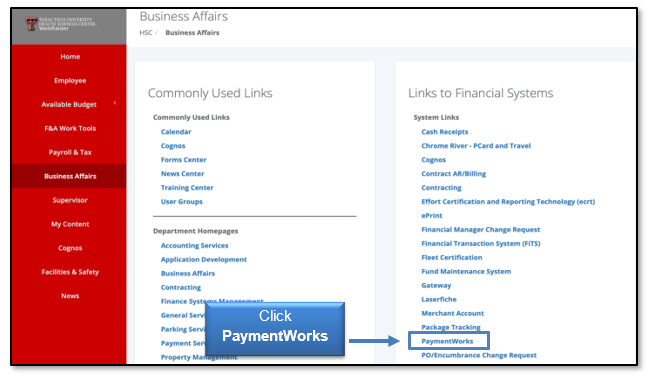
- WebRaider portal > Business Affairs tab > Links to Financial Systems > PaymentWorks
Sending Invitations
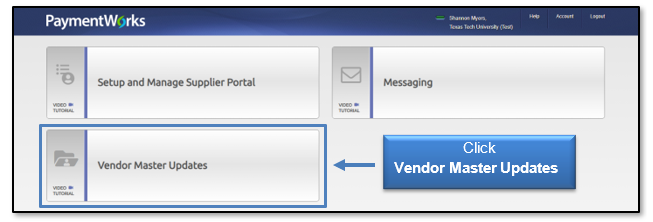
From the PaymentWorks dashboard, initiate the new vendor registration process by sending an invitation to the new vendor. Click Vendor Master Updates.
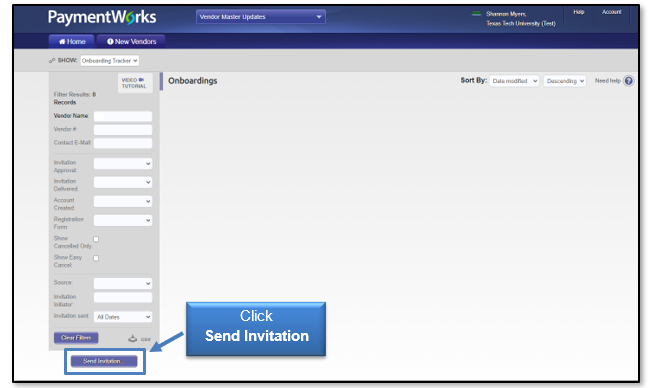
The New Vendors tab in the menu bar will display. Click Send Invitation at the bottom of the left sidebar to invite a new vendor.
The Invite New Vendor screen contains the fields seen below. Use the scroll bar on the right side to navigate the fields. Required fields are indicated with an asterisk*.
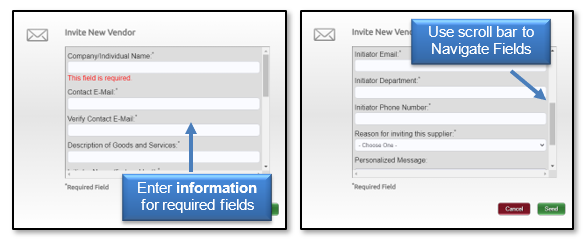
Adding a Personalized Message is highly encouraged. The message will be included in the email sent to the new vendor.
TTUHSC recommended personalized template:
TTUHSC has partnered with PaymentWorks for our online vendor solution which is free to you. It adds fraud protection, invoice payment status, and ease of vendor information management. “Insert Department contact name” from “Insert Department Name” invites you to register.

Once all the information is entered in the invitation, click Send.
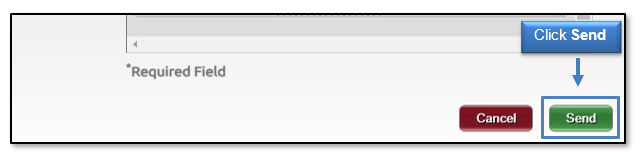
You will receive a message that your invitation is pending approval before being sent to the requested vendor.
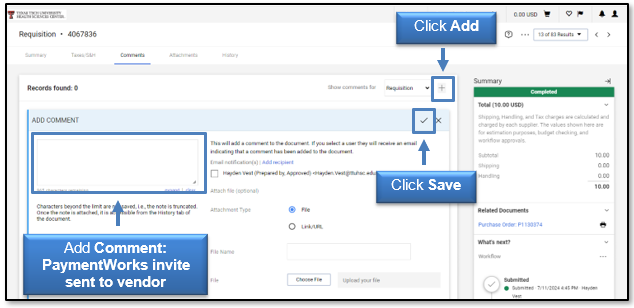
To allow the Vendor Team to quickly verify the vendor information, you will need to return to TechBuy and the requisition associated with the vendor and invitation submitted. To find the information, go to Documents > Search > My Orders > My Requestions. Once you click the requestion, select the Comments tab. Select the plus mark to add a comment such as PaymentWorks invite sent to Vendor. Then click the check mark to save the comment.
Viewing Invitations
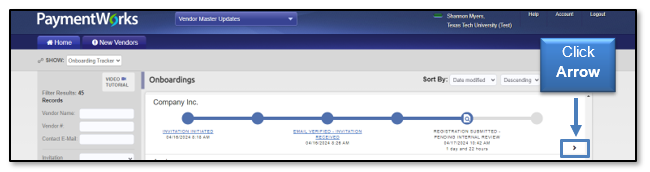
Invitations may be viewed by employees with access to PaymentWorks from the New Vendors tab. The Onboarding Tracker displays all invitation statuses in real time. Each bubble will have multiple statuses available. More specific invitation details may be viewed by clicking the arrow in a vendor invitation.
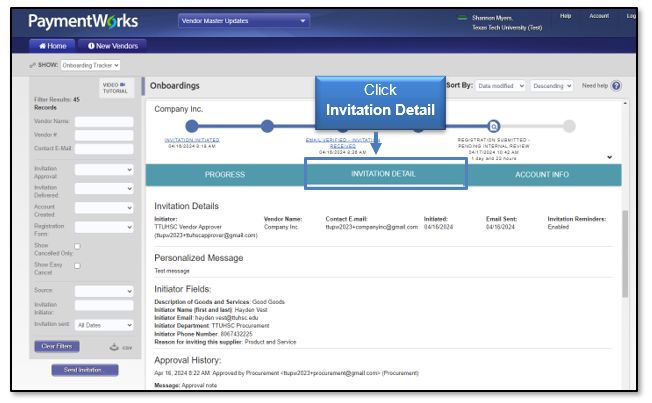
Click Invitation Detail in the details view of an Onboarding record. The details revealed include:
- Name and email address of the initiator
- Vendor Name, as filled out in the invitation
- Vendor e-mail address, as filled out in the invitation
- Date the invitation was first sent (will only differ from first sent if the invitation was re-sent)
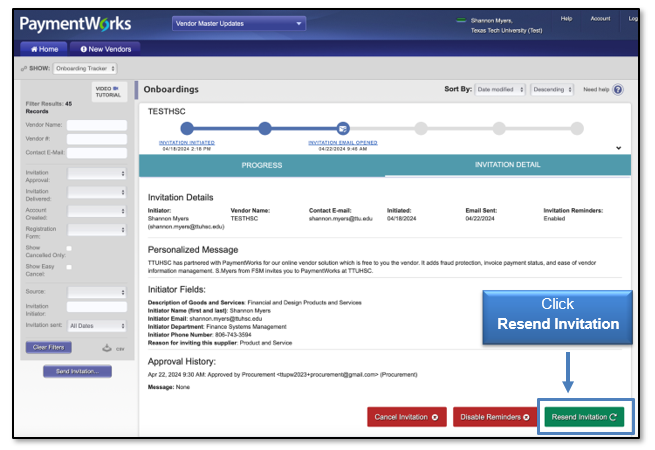
Resend Invitations
An invitation may be resent if the wrong Contact E-mail address was originally entered. An invitation may only be resent with a status of Sent, Delivered or Not Delivered. The Personalized Message may be updated if needed, if not, the original message will be included in the invitation being resent to the vendor.
Click Resend Invitation.
NOTE: Once a vendor opens the e-mail, the option to Resend Invitation (as well as cancel reminders) is not available.
An invitation may only be updated or edited by the initiator of the invitation.
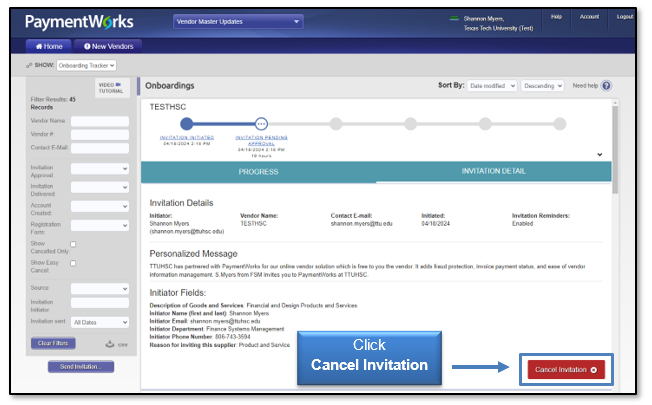
Cancel Invitations
The ability to cancel invitations allows you to avoid onboarding payees that are no longer needed and to reuse payee e-mail addresses. Cancelling an invitation will deactivate the invitation link that the vendor had received, preventing their ability to register.
Cancel Invitations should only be used to stop the invitation process as long as the registration has not been submitted by the vendor. Invitees can cancel invitations by clicking the Cancel Invitation button in the details view of an Onboarding record.
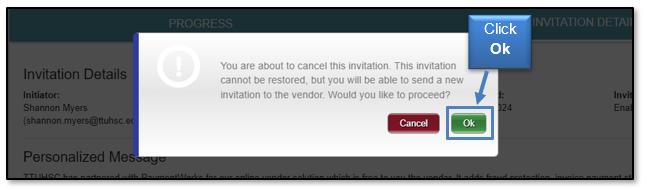
Click Ok when asked "Are you sure you want to proceed?" to continue with the deletion process.
A cancelled invitation shows a status of Cancelled. By default, cancelled invitations are not displayed in PaymentWorks, but users can adjust the filter options checking "Show Cancelled Only" to display all cancelled invitations in a search. Cancelling an invitation automatically disables reminders as well.
Customers are not able to delete invitations through their PaymentWorks account. PaymentWorks will no longer delete invitations as it can cause problems with the deleted data. PaymentWorks has updated the Cancel Invitation feature so there are no longer issues with deleted data. It is requested that all claimed and unclaimed invitations be cancelled by the customer.
Tracking Invitations
All invitations may be viewed in Onboardings to monitor the statuses toward completion.
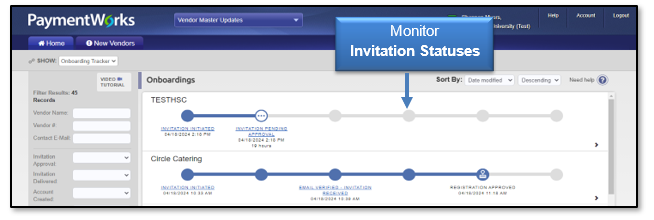
Filter Results on the side bar may be used to search for a specific vendor as in this example. Some of the search parameters include: vendor name, vendor number, contact email, status of invitation, status of registration form, and date invitation sent.
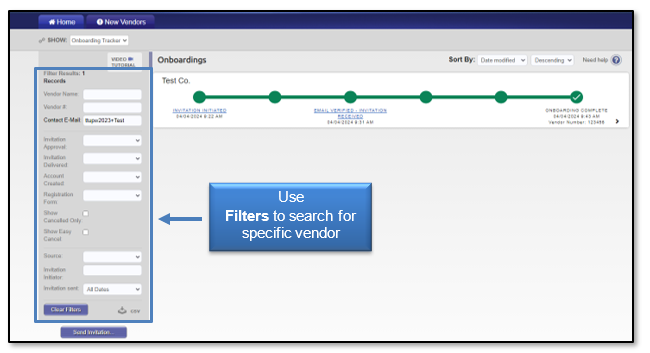
NOTE: A vendor must create a PaymentWorks account as well as submit a New Vendor Registration. A vendor is not fully onboarded with TTUHSC until there is a status of Complete in the New Vendor Registration column.
Onboarding Statuses
Invitation Column
Clicking a link in this column will display the invitation information as entered by the initiator.
- Sent - The invitation was sent to the email address included in the invitation. The invitation may need to be re-sent if this status does not change to Opened. Confirm the email address or enter a new email address to resend invitation.
- Delivered - The invitation was delivered to the vendor's email; however, the recipient has not opened the email. If it remains in this status for long, the vendor may need to check their spam/junk folder.
- Not Delivered - The vendor's email server rejected the invitation. This status is rare. It may be necessary to try a different email address or have the vendor's IT department make the appropriate changes to allow PaymentWorks to go through their server.
- Opened - The vendor has opened the email, but they have not yet clicked the link to begin the onboarding process.
- Clicked - The vendor opened the email and followed the link to PaymentWorks to create a PaymentWorks account. Note: Once a vendor clicks an invitation, you can no longer re-send the invitation.
- Cancelled - Initiator has clicked the Cancel Invitation link for that vendor.
Vendor Account Column
- No Account - The vendor has not yet set up a PaymentWorks account.
- Registered - The vendor has created their PaymentWorks account. Validation email was sent by PaymentWorks.
- Email Validated - The vendor has created their PaymentWorks account, and their email has been validated. Clicking this link will show the details submitted by the vendor.
New Vendor Registration Column
- Not Started - The vendor has not started their new registration form.
- Submitted - The vendor has submitted the registration for review.
- Returned - The registration has been returned to the vendor for correction or clarification.
- Approved - The registration has been approved.
- Processed - The registration has been processed and is awaiting connection with Banner.
- Complete - The Banner connection was successful and the Banner R# is displayed.
- Rejected - The Vendor Team has rejected the submitted registration form.
Onboarding Process Review
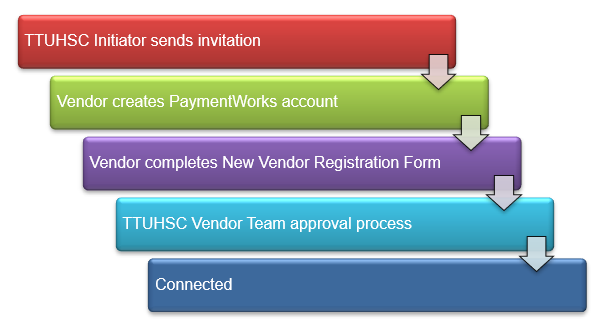
Step 1: TTUHSC Initiator Sends Invitation
The TTUHSC end-user will initiate an invitation in PaymentWorks to a vendor who will be requiring payment. The invitation will include a link that prompts the vendor to connect via PaymentWorks. An example of the invitation is below.

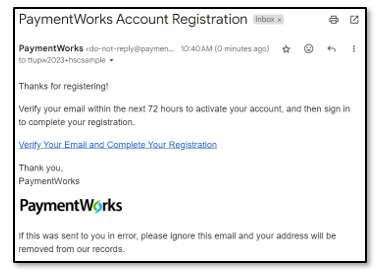
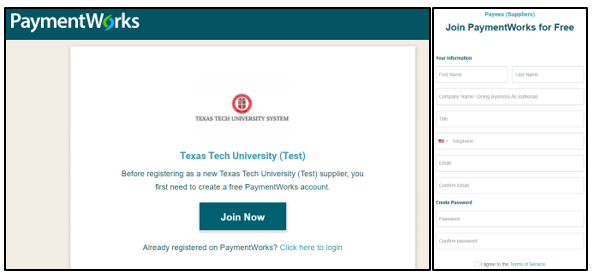
Step 2: Vendor Creates PaymentWorks Account
From the emailed invitation, the vendor will be prompted to join PaymentWorks. The vendor will then receive a separate email to verify their account. A vendor cannot access their account if they do not verify their e-mail.
Vendors with an existing PaymentWorks account will be prompted to connect with TTUHSC after logging into PaymentWorks.
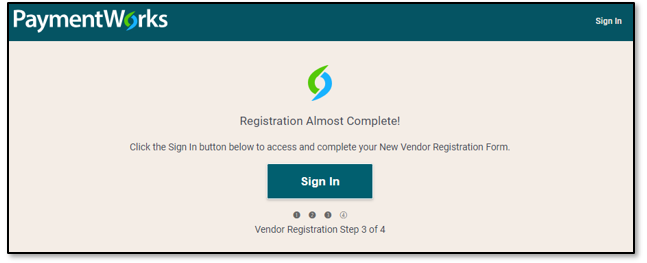
Step 3: Vendor Completes New Vendor Registration Form
After the vendor has joined PaymentWorks and verified their account, the first log in will prompt them to complete the New Vendor Registration Form.
This form allows vendors to provide their business profile information, including their address, their tax information such as EIN (for businesses) or SSN (for individuals), a W9 form (or similar for international vendors), and choose their preferred payment method and submit direct deposit information.

Step 4: TTUHSC Vendor Team Approval Process
Once the New Vendor Registration Form has been submitted by the vendor, the TTUHSC Vendor Team will review the information that has been submitted and take the appropriate action to connect the vendor to TTUHSC.
Step 5: Connected
Once approved by the TTUHSC Vendor Team, the vendor connection in PaymentWorks will be complete and the data will be interfaced with Banner with an R# given.
If you have additional questions, please contact the Vendor Team at vendorteam@ttuhsc.edu.
Visit the Help Center within PaymentWorks for training videos and additional help documents related to the Vendor Invitation and Status topic. To manage the type of email notifications you receive during the onboarding process, refer to this PaymentWorks Help article.
Contact
Finance Systems Management
-
Address:
3601 4th Street STOP 6209 | Lubbock, Texas 79430-6209 -
Email:
fsm@ttuhsc.edu