
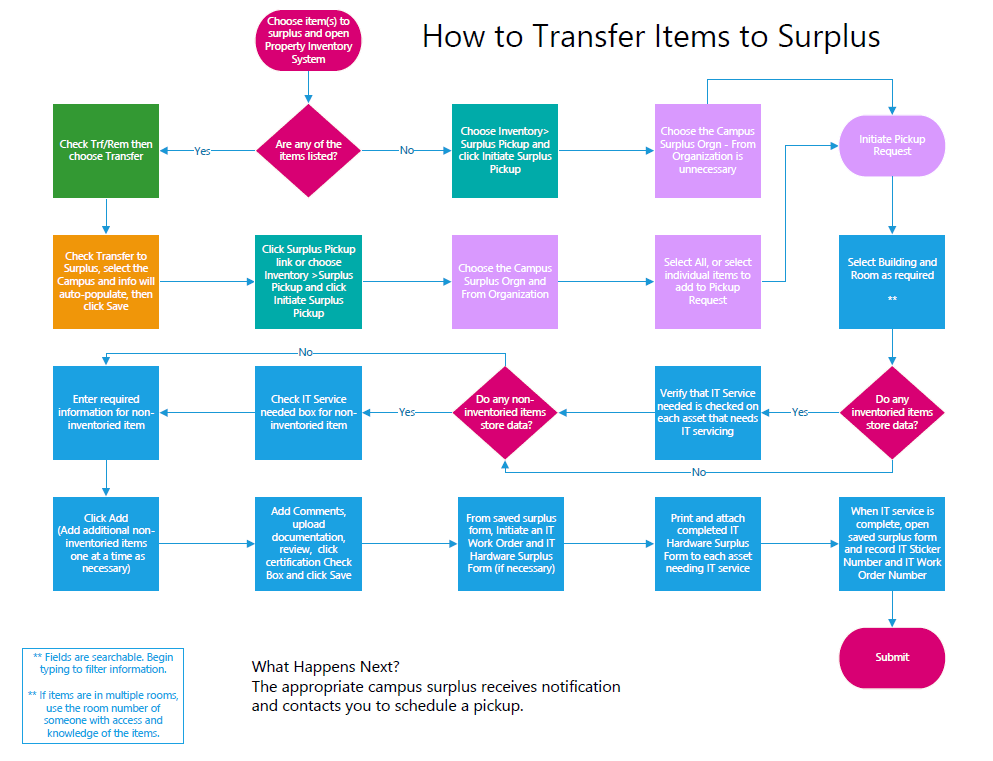
How to Transfer Items to Surplus
How to Submit Assets (Inventoried Items) to Surplus
- Visit the Property Inventory System.
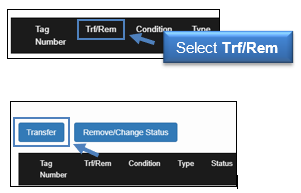
- Select the item(s) in your inventory that you would like to transfer to Surplus by checking the box for each inventory item line under the Trf/Rem column.
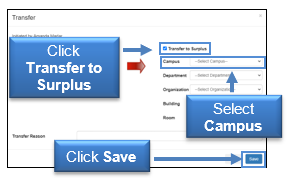
- A new box will open. In this box, select the Transfer to Surplus box. Then, select your Campus. Other relevant fields will auto populate. Once complete, select the Save button.
- A “Transfer Complete” box will appear that includes a link to initiate a Surplus Pickup. Select the link to begin the final portion of the process.
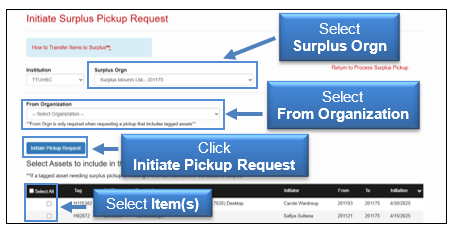
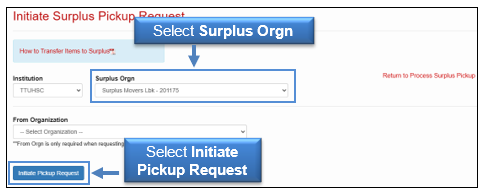
- The Initiate Surplus Pickup Request screen will appear. Select the appropriate Surplus Orgn and From Organization from the drop-down options. A list of items will appear. Select the item(s) to be transferred. Then, click the Initiate Pickup Request button.
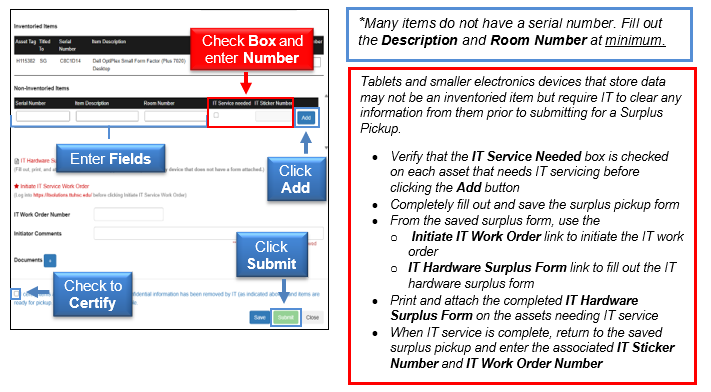
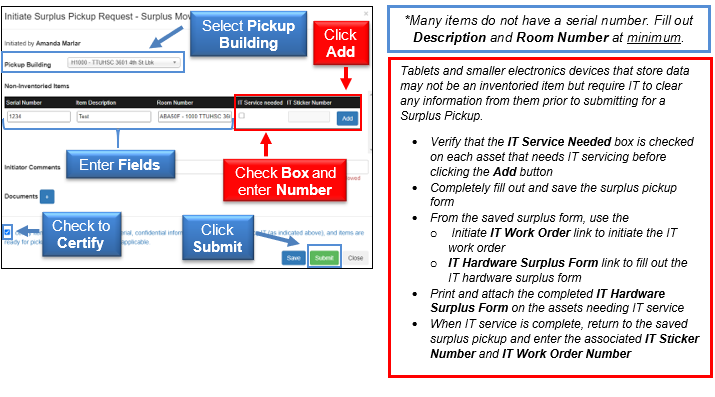
- A new window will appear that has the Inventoried Items listed under the Inventoried Items section. Use the drop-down to select the Pickup Building and then enter the Room number.

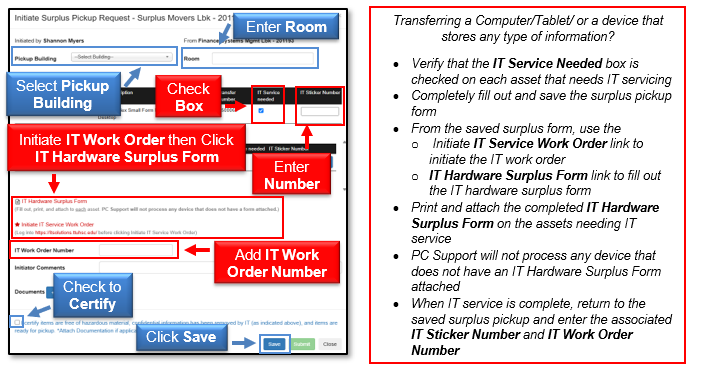
If you do not have any Non-Inventoried Items to add, select the small box at the bottom to Certify and then click Submit.
If you need to add Non-Inventoried Items:
Enter the information for the Non-Inventory item(s) in the fields provided in the Non-Inventoried Items section, and click the Add button. Continue to enter additional Non-Inventoried items.
When all of the items have been added, select the small box at the bottom to Certify and then click Submit to complete the pick-up request.
How to Submit Non-Inventoried Items to Surplus
- Visit the Property Inventory System.
- Select the Inventory drop-down and then select Surplus Pickup.
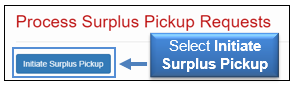
- A new screen will appear. Select the Initiate Surplus Pickup button.
- The Initiate Surplus Pickup Request screen will appear. Select the appropriate Surplus Orgn from the drop-down options. Information will populate on the screen. Select the Initiate Pickup Request button.
- A new window will appear. Use the drop-down to select the Pickup Building. Enter the information for Non-Inventoried Items in the fields provided and click the Add button. When all of the items have been added, select the small box at the bottom to Certify and then click Submit to complete the pickup request.

Refer to HSC OP 63.11 for more information.
What Happens Next
The appropriate campus surplus receives notification and contacts you to schedule a pickup or review the items.
*Any data storage devices without an IT “Surplus Approved” sticker will not be picked up.*
When the items are in the possession of Surplus, the asset tags are scanned. When all items on the pickup request have been verified, the transfer is complete and the items are no longer on your inventory.If you have additional questions, contact:
Abilene/Dallas - AbileneSurplus@ttuhsc.edu
Amarillo - generalservicesama@ttuhsc.edu
Lubbock - generalservices@ttuhsc.edu
Managed Care - generalservices@ttuhsc.edu
Odessa - generalservicespermianbasin@ttuhsc.edu
Contact
Finance Systems Management
-
Address:
3601 4th Street STOP 6209 | Lubbock, Texas 79430-6209 -
Email:
fsm@ttuhsc.edu