
TechBuy - Entering FOAP Information
One of the most important aspects of the requisition process is adding the account codes. You can add accounting information to the header or to individual line items. Accounting entered at the header level will apply to all items in the order. Entering accounting information by line item allows you to code each item individually. You can have both header-level and line-item accounting on one document. If both exist on the document, the line-item accounting will override the header accounting information.
Header Level Account Codes (Profile Values)
The TechBuy User Profile training web page walks through the steps to add FOP information into your profile. This web page provides information on selecting the FOAP elements from the values previously added to your profile.
There are three ways to add accounting codes at the header level:
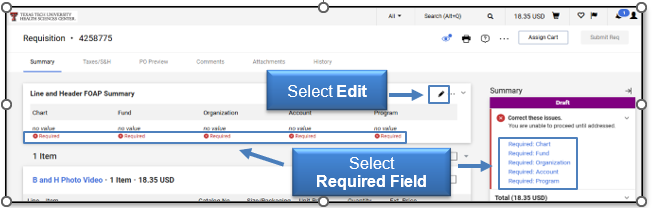
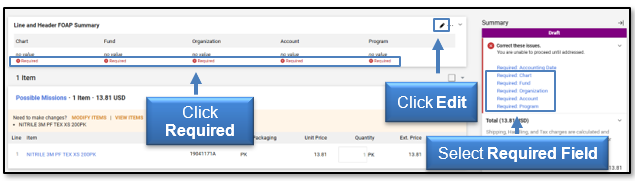
- Click a red, Required link located directly underneath any missing accounting code field in the Line and Header FOAP Summary section
- Select a blue, Required link for any missing accounting code in the Summary Draft section
- Select the Edit (pencil) icon in the top right of the Line and Header FOAP Summary section
If you saved specific FOAP values as defaults in your profile, they should automatically populate. If you do not have a default value or need to change the current value, click Search.
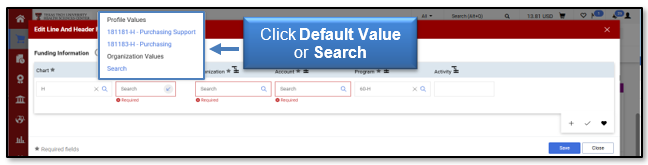
The new value will now populate in the field. Follow the same process to change any additional FOP elements necessary to create a valid budgeted FOP.
Note: The FOP elements must be a valid budgeted combination, or the order will fail. The TechBuy User Profile document recommends not adding a default account code in your profile. The account code is determined by the item(s) purchased.
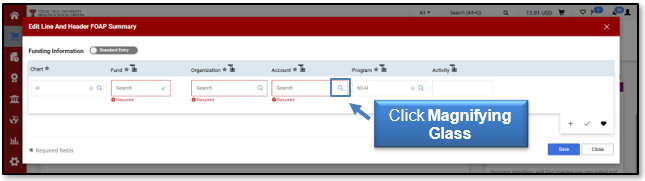
Click the Magnifying Glass link under the Account field.
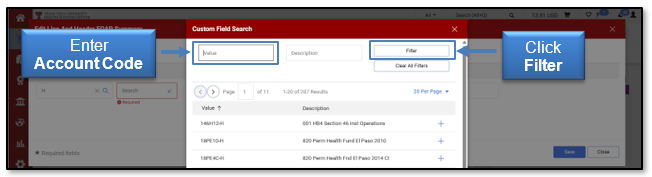
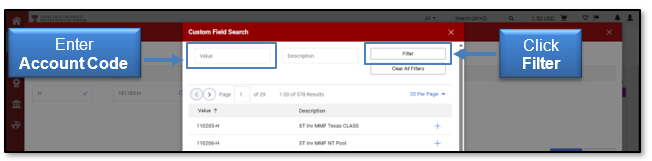
The Custom Field Search window will open. If you know the appropriate account number, type the account code in the Value field and click Filter.
Note: It is important to search for the value instead of typing it into the Account field directly. Typing it into the Account field directly can result in order failures.
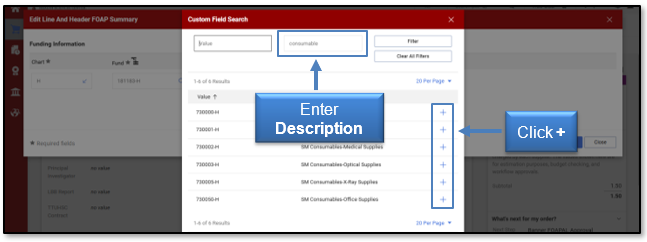
If you do not know the account number, you can search utilizing the Description search field. A list of all values meeting your search criteria will populate. Click + to the right of the appropriate value.
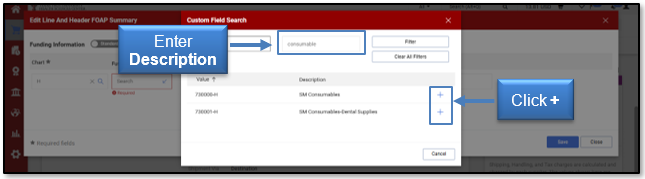
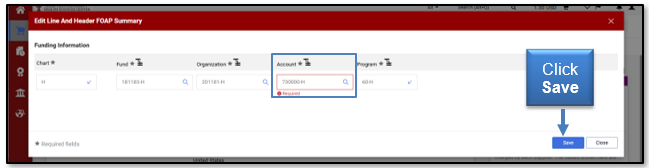
The value(s) will now populate in the Account field. Select Save.
Header Level Account Codes (All Values)
This section will review adding accounting information to a cart if you have not entered the accounting information in your profile.
Note: We recommend reviewing the TechBuy User Profile document and adding the accounting information to your profile for more efficient processing.
Choose from three areas to assist in adding accounting codes to the Line and Header FOAP Summary: 1) Click a red, Required link located underneath any missing accounting codes in the Line and Header Summary section; 2) select a blue, Required field link in Summary Draft section; or 3) click Edit in the top right of the Line and Header FOAP Summary section.
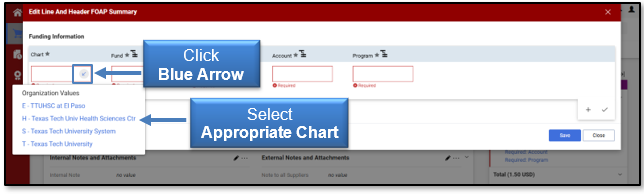
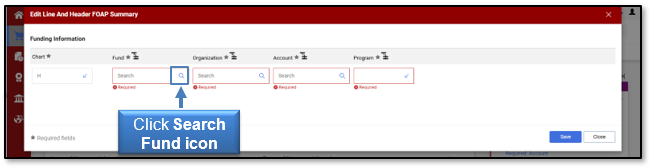
The Edit Line and Header FOAP Summary window will open. You must select a Chart Code from the list of values before you can enter any additional values.
Note: It is important to search for values instead of typing into the field directly. Typing a value into the field directly can result in order failures.
Click the blue arrow to the right of the Chart field. A drop-down box will list the four available Chart codes. Select the appropriate chart from the list.
Click the Search Fund (magnifying glass) icon to the right of the Fund field to help find the Required Fund.
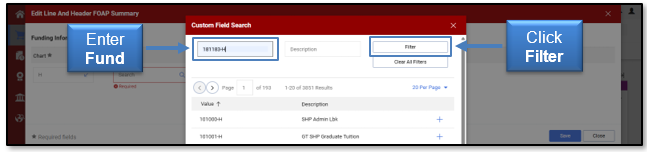
The Custom Field Search window will open. Enter your Fund into the Value search criteria field and click Filter.
Note: The Fund Manager must grant authority before you can purchase against a fund.
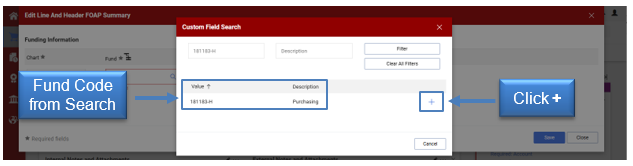
The Fund code should populate beneath the search window. Click + next to the description to add to the Required Fund field.
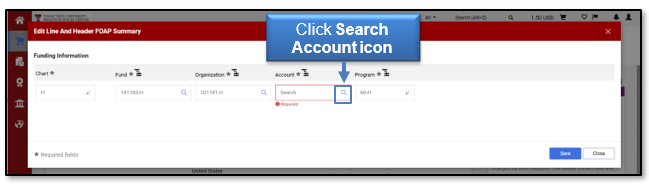
The Fund code is now listed on the Funding Information window. Follow the same steps to add the Required Organization and Required Program codes.
Note: The FOP elements must be a valid budgeted combination, or the order will fail.
The account code assigned should be determined by the item(s) purchased. Click the Search Account icon to the right of the Account field.
The Custom Field Search window will open. If you know the appropriate account number, enter the account code in the Value field and click Filter.
Note: It is important to search for the value instead of typing it into the field directly. Typing it into the field directly can result in order failures.
If you do not know the account number, you can search utilizing the Description search field. A list of all values meeting your search criteria will populate. Click + to the right of the appropriate value.
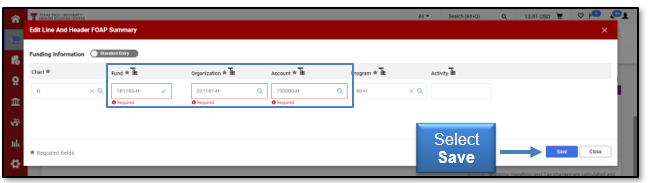
The value will now populate in the Account field. If your FOAP information is populated correctly, select Save.
The header level FOAP account code is now populated in the requisition form, and the errors have been removed.

Line-Item Account Codes
When you purchase items that need to charge different FOPs or the items should have different Account codes, you will need to apply line-item accounting. Line-item accounting also allows you to add multiple FOPs per item (split accounting).
To apply line-item account codes, select the Edit (pencil) icon from the upper right-hand corner of the Line and Header FOAP Summary section.

The Line and Header FOAP Summary screen will open. Any header-level FOAP elements will display above the Supplier/Line-Item Details section.
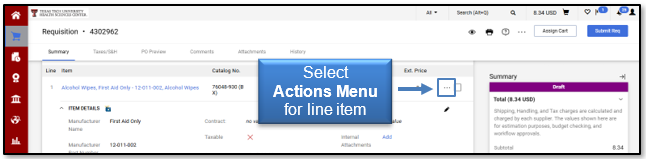
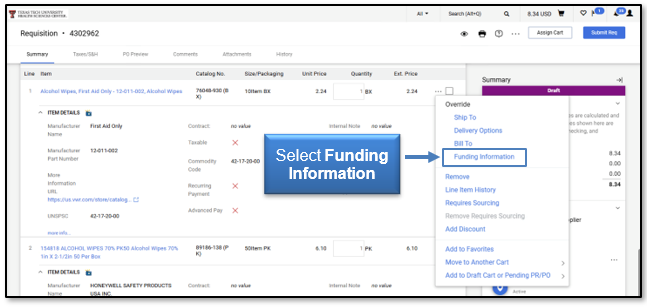
Each item listed in the cart will display Funding Information (same as the header). If you need to assign a different FOAP to a specific line item, select the Actions (dots) menu to view tasks for the selected line item.
Select Funding Information from the drop-down menu.
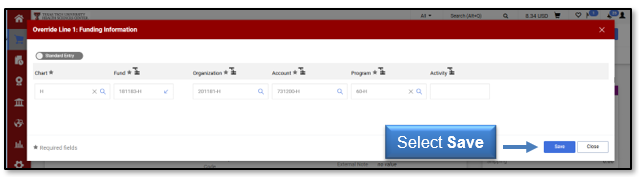
The current header information should populate for each value. To change the current value, click the blue arrow and then select the appropriate value.
Verify all elements of the FOP, create a valid budgeted FOP, and make any necessary changes by following the same process.
Note: The FOP elements must be a valid budgeted combination, or the order will fail. The account code should be driven by the item(s) purchased, so you may find it necessary to change the account code by item.
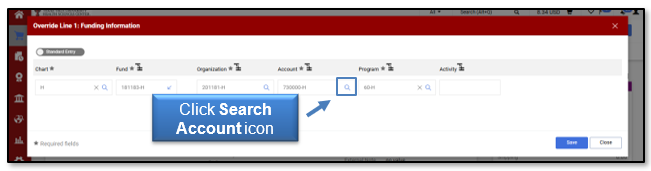
Click the Search Account icon to the right of the Accounting field.
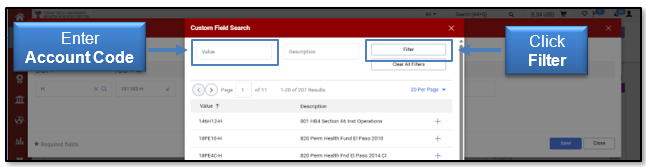
The Custom Field Search window will open. If you know the appropriate account number, type the code in the Value field and select Filter.
Note: It is important to search for the value instead of typing it into the field directly. Typing it into the field directly can result in order failures.
If you do not know the account number, you can search utilizing the Description search field. A list of all values meeting your search criteria will populate. Click + to the right of the appropriate value.
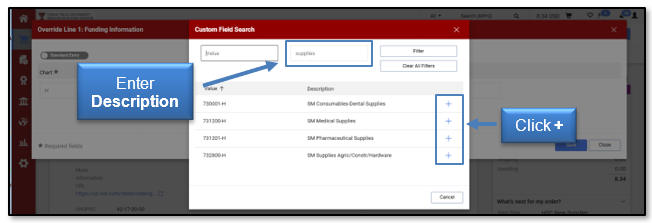
The value will now populate in the Account field. If your FOAP information is populated correctly, select Save.
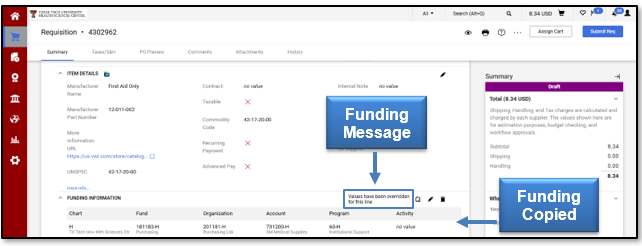
The new accounting information will be copied on the line item. The item will provide the message: “Funding Information - values have been overridden for this line.”
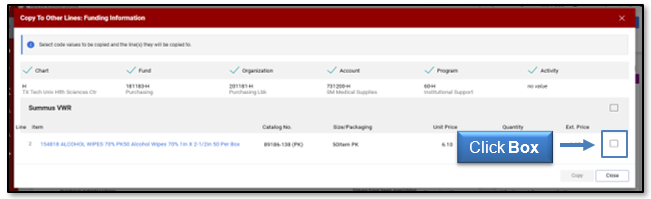
You may add the same account information to other line items by selecting copy line 1 funding information to other lines. This will bring up the Funding Information window. Click the box next to the line you want to change.
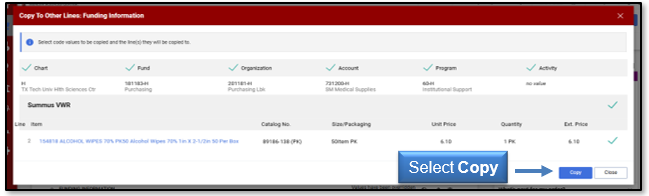
This will turn the box into a checkmark. You can also decide the accounting codes to copy for this line by checking or unchecking above the accounting fields but make sure the FOAP is a valid budgeted combination. Once the funding information is correct, click Copy.
If you have any additional questions, contact purchasing@ttuhsc.edu.
Contact
Finance Systems Management
-
Address:
3601 4th Street STOP 6209 | Lubbock, Texas 79430-6209 -
Email:
fsm@ttuhsc.edu