
TechBuy - Export Searches
Manage Search Exports
When you perform a document search, you can export the results for further reporting and analysis. The Manage Search Exports feature allows you to perform these exports after executing a Saved Search and to schedule recurring instances of certain report types.
When you export a Saved Search, a downloadable .csv file is created. The file is available on the Manage Search Exports page from your user profile or by selecting Manage Search Exports from the Export drop-down list on a search results page. The file is available for a period of seven days.
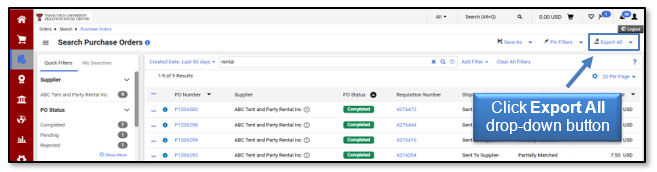
To begin exporting your search results, select the Export All drop-down button.
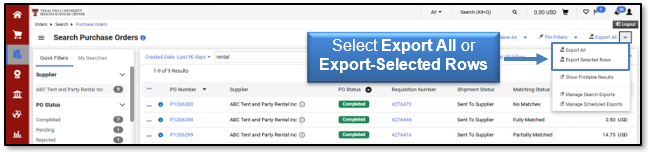
You will be able to export the entire search or individual rows of the search. You will need to check the box next to one or more rows if you want to export rows.
Select either Export All or Export-Selected Rows.
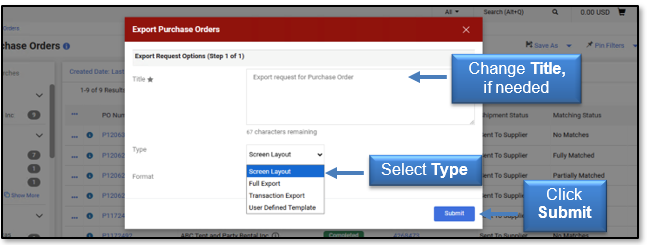
A default Title is provided, but you may change the Title Name for export. The Format is automatically defaulted.
Select a required Export Type from the drop-down menu.
- Screen Layout - Screen Layout will export the search results exactly as they appear on the results screen with no additional data. The data in the Screen Layout will vary based on the document type you have searched for.
- Full Export - Full Export will export all information available about the transaction associated with each document. Full Export also includes document histories such as approvals, comments and more. Full export is only available for Purchase Requisitions and POs. It is not a recommended export type. Contact the system administrator for additional information.
- Transaction Export - Transaction Export will export all information available about the transaction associated with each document. Transaction Export is not available for All Document searches.
- User Defined Template - A User Defined Template produces columns of information in a file format defined by your needs. You may also create a User Defined Template by navigating to the Manage Export Templates, Export Template Tab, Create Template for, and choose from the drop-down list.
- New Template - Follow the three steps to create custom fields for your New Template.
- Shared by Others - Templates created to be shared and only available for Purchase Order exports.
Note: If you are exporting a search with multiple document types, you must select Screen Layout.
Click the Submit button.
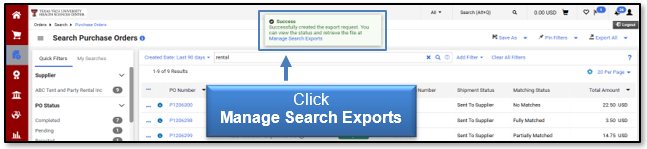
Once successfully submitted, you will see a confirmation message where you may view the status and retrieve the file by clicking Manage Search Exports.
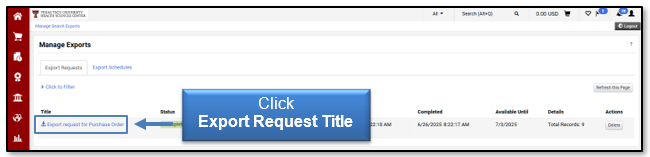
Click the Title of the Export Request to view or download the item.
Export Results from a Saved Search
When you export a Saved Search, dates will be relative to the time you request the export instead of the date you saved the search. For example, if you select to export a Saved Search that searches for the last 30 days, it will return results dated 30 days from the date of the export.
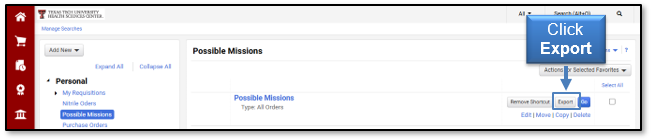
To begin exporting data from a Saved Search, locate Saved Searches from the Manage Searches page or from your User Profile then Manage Searches. After you have chosen the search you would like to export, select the Export button.
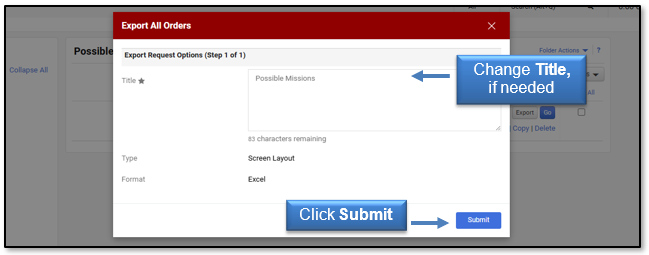
A default Title is provided, but you may change the Title for export. The Format is automatically defaulted.
The Type of export defaults to Screen Layout. To submit your export request, click Submit.
The export will be available in the Export Request tab of the Manage Search Exports section.
Downloading Search Exports
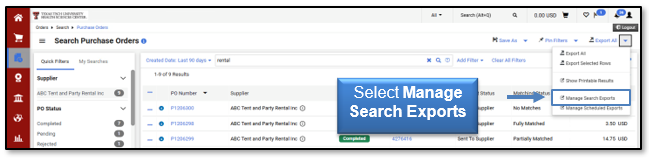
You may access exports in the Manage Exports section. Access this section from your User Profile then choose Manage Search Exports. You may also select the Manage Search Exports option from the Export All drop-down button on a search results page.
If there are several exports, you may want to filter them to locate the export you want to download. Select the Click to Filter link.
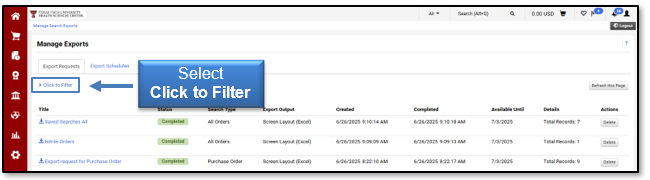
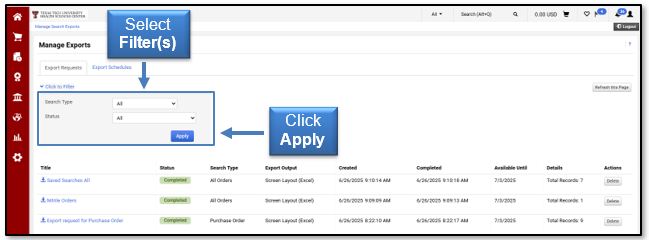
Use the export filter options to narrow down the history entries to a specific search type or status.
- Search Type - Select to filter exports by document type. The default is All.
- Status - Select to filter exports by status. The default is All.
Click Apply after selecting your export filter option(s).
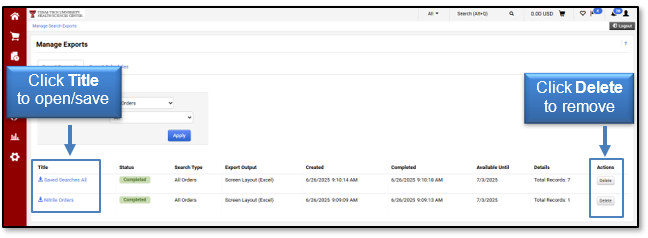
Click the Title for the export you want to download. The file may then be opened and/or saved to your computer.
After you have downloaded the file, you can choose to remove it from the exports. Click the Delete button under the Action column for the appropriate export file.
Export Schedules
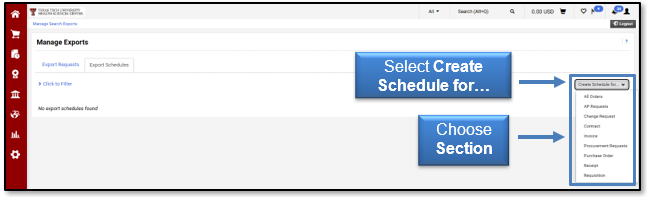
In the Manage Exports section, you may also create Export Schedules for any document types, as long as you have a Saved Search for that document type. In the Export Schedules tab, select Create Schedule for... and then choose a Section that you want to schedule for export.
Keep in mind, you will need to have already created templates or Saved Searches for the sections in order to have options to choose from.
Note: The AP Requests and Procurement Requests sections do not provide any functionality for users at this time.
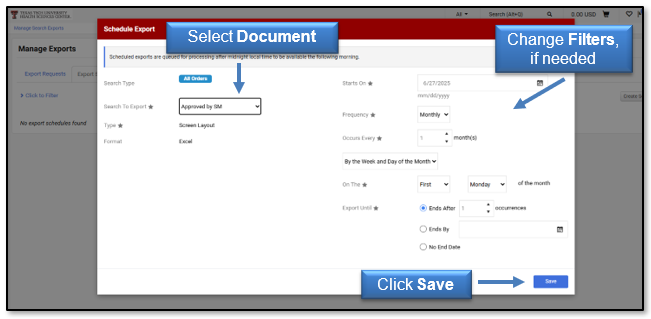
From the Schedule Export screen, you will begin to make you selections regarding your specific export. Determine the document you want to schedule from the Search To Export drop-down list.
The Type of exports will default to Screen Layout.
You may change the defaulted Starts On, Frequency, Occurs Every, and Export Until for the schedule. These filters mean a Scheduled Export will run based on the date range, day or specific date you create for it. When setting a schedule, you may set the export as recurring, with a specific expiration date, or with no end date.
Once all the required information is selected, click Save.
Scheduled exports are in the Export Schedules tab of the Manage Search Exports section.
If you have additional questions, please contact Procurement Services at purchasing@ttuhsc.edu.
Contact
Finance Systems Management
-
Address:
3601 4th Street STOP 6209 | Lubbock, Texas 79430-6209 -
Email:
fsm@ttuhsc.edu