
TechBuy - Types of Document Searches
Document Search
The Document Search feature provides an efficient way to locate documents within TechBuy for review and processing. Document Search allows you to search across multiple documents using a simple entry text box. Additional search features include filtering options, date range options, and advanced search features.
Documents include purchase requisitions, purchase orders, invoices, and receipts. The data contained in the Document Search results will vary based on the document type. The document types available for searching are dependent on your permissions. For example, if you do not have permission to view invoices, then you will not see that document type as an option.
You can perform a Quick Search or an Advanced Search:
- Quick Search - allows you to perform a variety of searches from anywhere within the TechBuy application by entering a number or keyword in the Search field. The Search field is available in the application header or from the Orders menu navigation.
- Advanced Search - allows you to use the filter options to perform a more specific search and offers you the ability to pin the filters so that they become your default filters when you come back to the page.
Quick Search
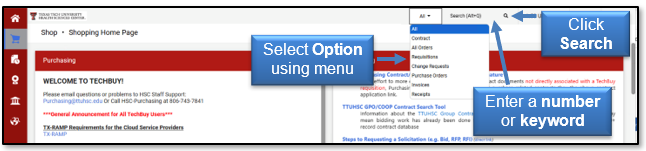
Quick Search provides a faster way to perform some searches. To conduct a Quick Search from the Shopping Home Page, select from the following Options using the drop-down menu:
- All
- Contract
- All Orders
- Requisitions
- Purchase Orders
- Invoices
- Receipts
Next, enter a number or keyword in the text box and click the Search icon or press Enter/Return on your keyboard.
You will automatically be taken to any matching search results. Use the left-to-right scroll arrows to view any of the multiple pages of results.
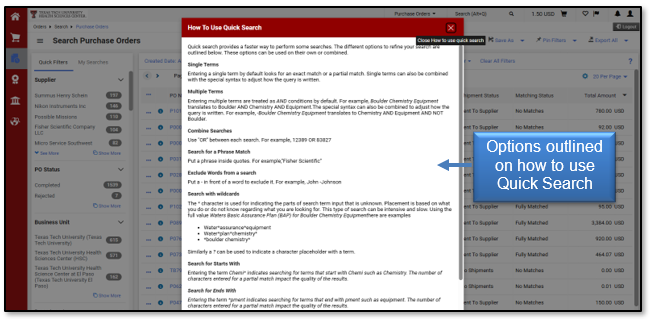
To help refine your Quick Search, select the question mark icon next to the text box.
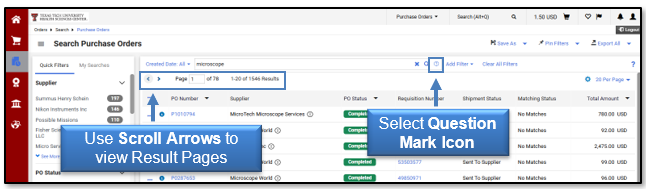
Some of the helpful tips include:
- Combine Searches - Use "OR" between each search. For example, 12389 OR 83827.
- Search for an Exact Match - Put a phrase inside quotes. For example, "Fisher Scientific".
- Exclude Words from a Search - Put a dash in front of a word to exclude it. For example, John-Johnson.
- Search for Wildcards - Put an * in your word as a placeholder. For example, 123*98.
- Search for Placeholder - Put one or more question marks as a placeholder. For example, 1234??6.
Quick Filters are available to help further narrow search results by including specific criteria. As you select the available Quick Filters, the details of the search are updated with the chosen search criteria.
Quick Filters will depend on the type of search conducted. Examples of filters include:
- Approved By
- Business Unit
- Contract Type
- Department
- Form Type
- Invoice Status
- Item Type
- Matching Status
- Participant
- Prepared By
- Prepared For
- Product Category
- Product Flags
- Receipt Status
- Status Flags
- Supplier
To view the entire list of options for a Quick Filter, select the See More link. The arrows alongside each Quick Filter allow you to open and close each filter.
Quick Filters may be added in two ways. First, click an Option below any of the Quick Filters. This approach only allows you to add one option per Quick Filter category. For example, click Texas Tech University Health Sciences Center (HSC) below the Business Unit Filter. This option will then be added as the Business Unit Quick Filter.
The filters will display just above the search results. You may click the Filter Arrow next to a specific filter to display and alter your filter selection.
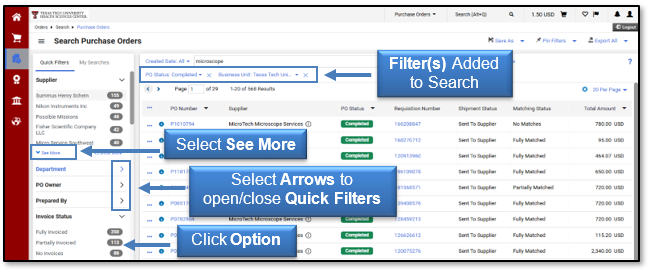
The second way to attach Quick Filters to a search allows you to add multiple or all of the available options within a filter. Select the Show More link for a Quick Filter.
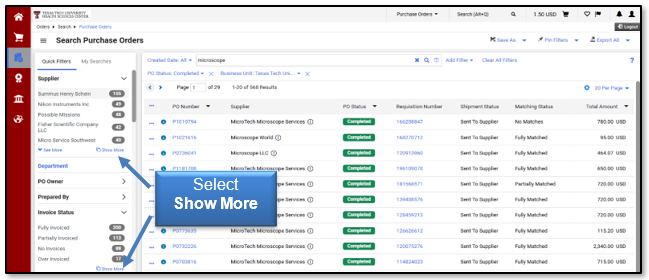
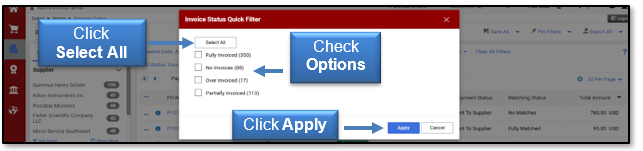
You'll be able to check the options within the Quick Filter you want to apply to help narrow your search. You may also choose a single item, multiple items, or all options in the Quick Filter by clicking Select All. After making your selections, click Apply.
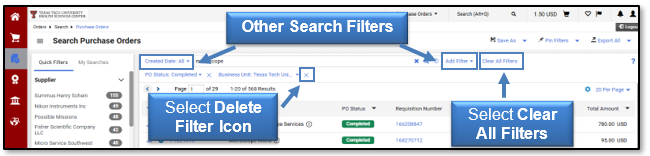
If you need to remove Quick Filters, click the Delete Filter icon next to the specific filter name or select the Clear All Filters button to remove all filters.
You may also use the search filters displayed near the top of the screen to help with your document search results. The filter criteria available will depend on the type of document you are searching for. These filters will be explained in more detail in the Advanced Search section.
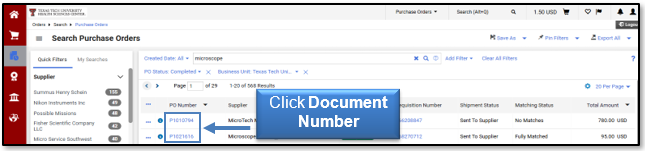
When you locate the document you need from the search results, click the document number to view the file.
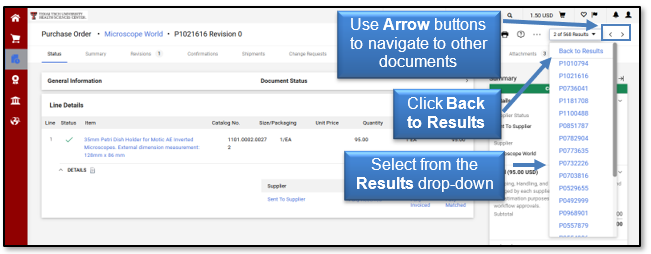
Once the document opens, you may navigate to the other search results using the arrow buttons or select the Results drop-down menu to display links to the other document numbers. You will stay on the document in edit mode without ever having to return to your search results.
To return to the search results page, click the Back to Results from the drop-down menu.
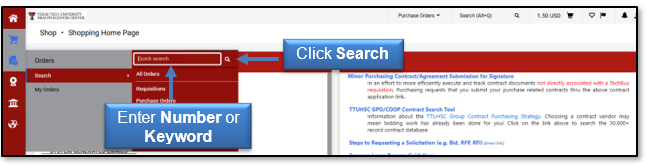
Quick Search for All Orders
Another way to perform a quick search for All Orders is by opening the Orders menu navigation. Enter a number or keyword in the Quick Search text area. Click the Search icon or press Enter/Return on your keyboard.
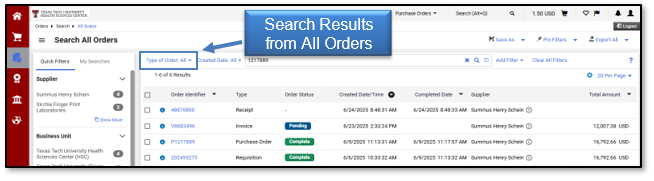
The Quick Search will provide search results for All Orders. You may then apply filters to narrow the search, if needed.
Advanced Search
Advanced Search offers you the option to enter very specific, detailed search criteria. As you select different document types, the Advanced Search fields change and are specific to that document type. When you know up front what criteria you are looking for, with Advanced Search, you can pre-select those criteria.
You have two ways to begin an Advanced Search. From the Home page, scroll to the Document Search sections. Select the Advanced Search link. This will take you to the appropriate search page.
Note: The AP Requests and Procurement Requests sections do not provide any functionality for users at this time.
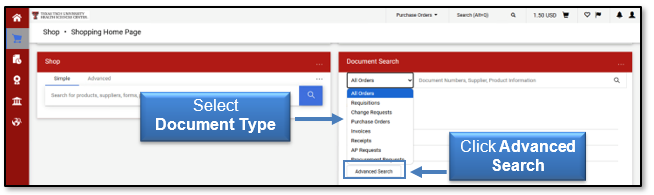
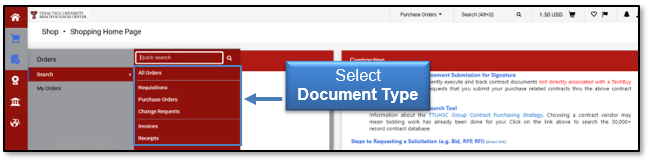
You may also access an Advanced Search by clicking the Orders icon from the left navigation menu on the Shopping Home Page, and then clicking Search. This provides access to search pages for All Orders and specific types of documents, including: Requisitions, Purchase Orders, Change Requests, Invoices, and Receipts.
Selecting any of these document types will give you a more focused search and specific filters related to that document type.
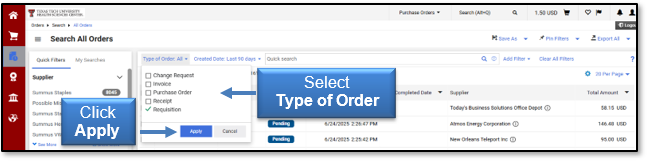
The Type of Order filter is available when you search All Orders. You will be able to narrow your search to specific document types using the drop-down menu. Once you have made your selection, click Apply.
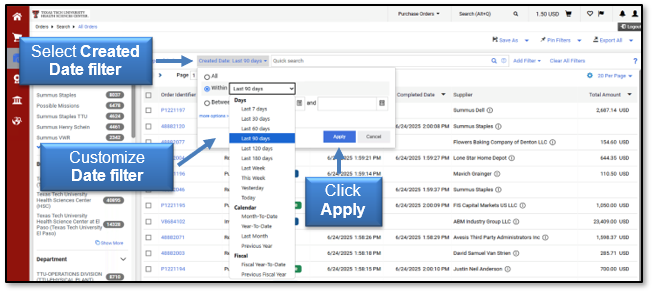
By default, the search results show documents for the last 90 days. You may change the search results to show a different date range by selecting the Created Date filter. After you customize your time frame or select from the pre-determined time limits, click Apply.
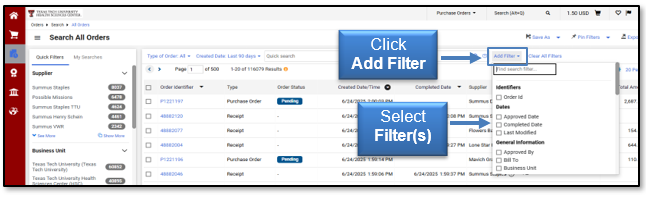
You may add multiple filters or columns to a search by clicking the Add Filter drop-down button. Depending on the document type, a list of available filters will display in these categories:
- Identifiers
- Dates
- General Information
- Item Details
- Properties
- Custom Fields
Select the Filter(s) that you want to add by checking the box next to the filter. You may also search for a specific filter by entering a value in the Find search filter field.
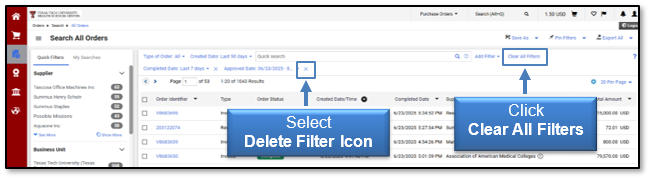
To remove a filter, select the Delete Filter (x icon) next to the specific filter name or you may click the Clear All Filters button to remove all filters.
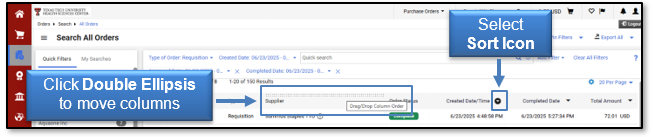
You may sort search results by columns in ascending or descending order by selecting the sort icon next to the column.
You may also move column(s) left and right by hovering immediately above the column title and revealing a line of double ellipsis. Click the double ellipsis to drag and drop column(s) either left or right to the desired location.
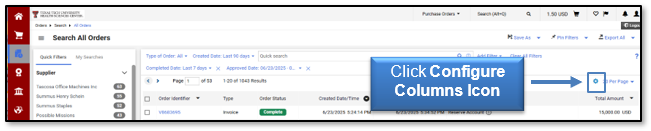
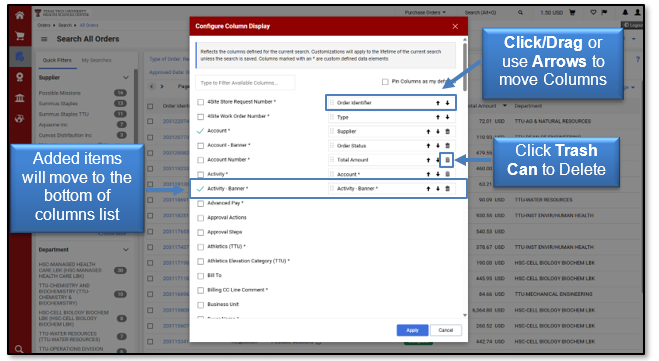
You have the ability to choose the columns that display in the search results and the order in which they display by configuring the search results columns. Click the Configure Columns icon to access the Configure Column Display screen.
All available columns are listed on the left, and a list of selected columns displays on the right. You can determine the sort order on a search results page.
To add a column, locate the column by scrolling through the list or entering a value in the search field. Click the checkbox for each column you would like to add from the available column list on the left.
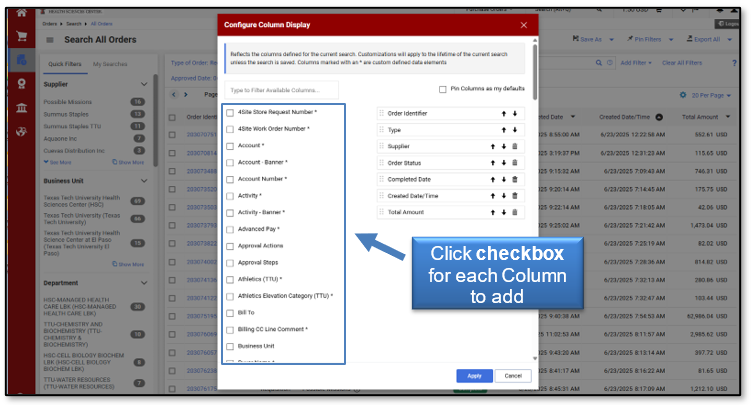
The columns are automatically added to the bottom of the selected columns list on the right. If a column needs to be deleted, locate the column from the list on the right side, and click the trash can icon. The column is moved back to the available columns list.
To configure the columns for the search results, click and drag the columns to the desired location or use the up and down arrows.
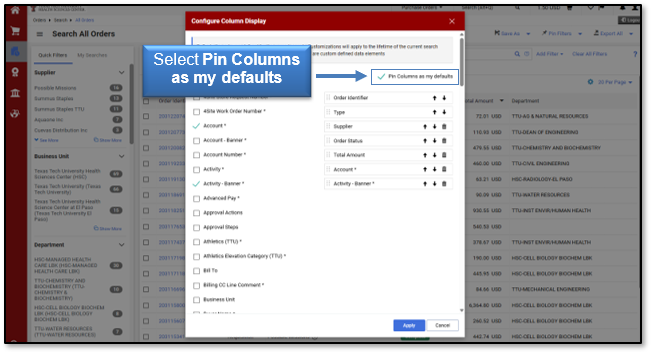
By default, the updated selected and sorted columns only display for the life of the current search. If you would like to keep the column configuration for all searches going forward, select the Pin Columns as my defaults checkbox.
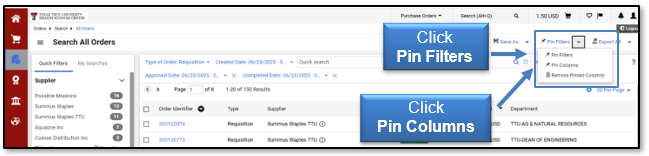
You may also save the columns in their current order from a search results page. Select the Pin Filters drop-down menu and then click Pin Columns. Click Yes to default the configuration each time you return for a search in that section.
My Orders
From the My Orders Menu Navigation, you may search for your documents by choosing one of the document types:
- My Requisitions
- My Purchase Orders
- My Invoices
- My Receipts
- My Change Requests
- Draft Change Requests
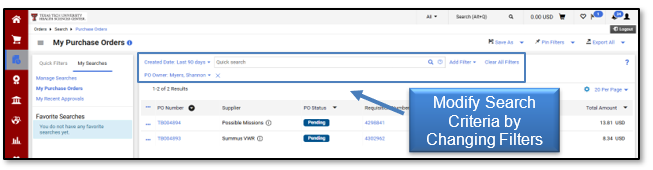
Using these sections allows you to take advantage of the date range options and the post-search filters that are available. The default date range for these links is 90 days. You will only see links and documents that you have access to. These sections will also contain your Favorite Saved Searches. Select a document type.
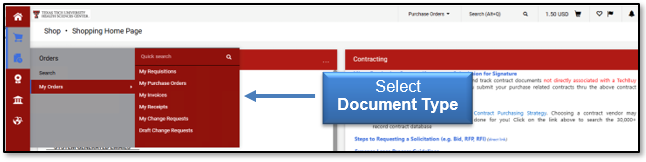
If any of the documents match your search, they will display. For example, if you have no purchase orders that list you as the owner in the last 90 days, no results will display.
You may try modifying your search criteria by removing/adding filters.
For questions, please contact Procurement Services at purchasing@ttuhsc.edu.
Contact
Finance Systems Management
-
Address:
3601 4th Street STOP 6209 | Lubbock, Texas 79430-6209 -
Email:
fsm@ttuhsc.edu